
1. What is the resistance and hardness of microcement?
One of the particularities of microcement compared to other decorative coatings is its high resistance and hardness. In the cases of Sttandard Microdeck, Sttandard Microstone and Evolution Microdeck, they can even be used in high traffic areas.
Many factors can influence the resistance and hardness of this coating, such as: the substrate on which the microcement will be applied, the type of microcement selected or the sealer, among others.
Mechanical resistance
Microcement resistance to impact: Although microcement is a relatively hard material, resistance to impact depends to a certain extent on the hardness of the substrate. Microcement, due to its low thickness, will deform in the event of a strong blow if the support is deformed.
For example, if we apply microcement on plaster and the base is deformed because it is not very resistant, the microcement will also deform. On the other hand, if we apply microcement on terrazzo or similar substrates, the resistance of the microcement will be greater.
Resistance of microcement to abrasion and wear: The resistance of microcement to abrasion or wear also depends on the type of microcement and the sealant used. Topciment has three continuous floor coverings available: Sttandard MicroDeck and MicroStone, Evoluttion Microdeck and Efectto Medium. All are coatings with selected aggregates of larger particle size, making them more resistant to compression and abrasion.
Sttandard and Evoluttion Microfino or Efectto Small, due to their lower resistance, are reserved for wall cladding. As for the sealers, although the resistances are the same, the higher the gloss, the more visible the wear marks are. Matt finishes do not reflect light or reflect it minimally and satin finishes are the most natural.
Chemical resistance
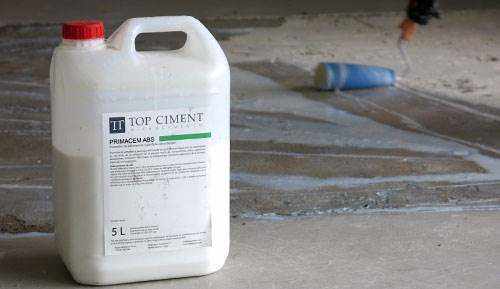
Resistance of microcement to stains and liquids: The resistance of microcement to stains and liquids will depend on the sealant used to protect the coating. The sealer is the final layer of the microcement application, which is what makes it waterproof and protects it from stains. Our Topsealer sealers are highly resistant to stains and liquids. According to the different tests carried out, Topsealers protect against oil, cola, red wine and similar stains.
Microcement stains from vinegar or lemon juice leave slight marks after two hours of exposure. This surface is affected by acid just like marble, although if we act by cleaning quickly, no marks will be left. Stains from salfumán, pure bleach, acetone and ammonia leave marks after half an hour of exposure. However, if we clean the microcement quickly, no marks will be left. The texture of the microcement and the difficulty of cleaning must also be taken into account.
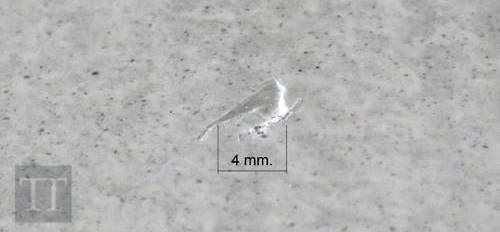
Marking due to a sharp object hitting Microdeck floor
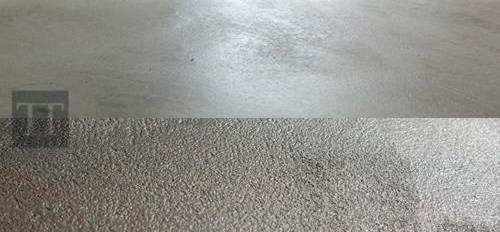
Different texture and resistance of a floor with microcement
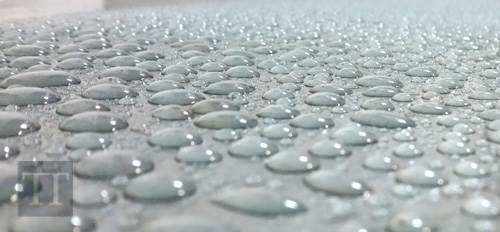
Impermeability of microcement
2. On what substrates can microcement be applied?
Yes, microcement cannot be applied on natural wood or supports formed by pieces that can expand differently.
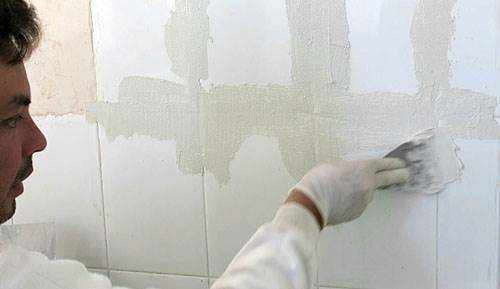
One of the main properties of microcement is its high adherence. Thanks to this, it is possible to apply microcement on tiles, speeding up renovations and avoiding the removal of the original covering. As long as the tiles are firm and not loose. In these cases it is necessary to use the mesh to support the support.
See the method of applying microcement on tiles with video tutorial.
Microcemento sobre azulejos, gres o terrazzo
Optimal conditions and state of the surface to be coated
The preparation of the substrate is as important as the application of microcemento. If the substrate does not meet the necessary conditions, we will not be able to apply the microcement with guarantees. The surface must be level, consolidated, free of dirt and with a humidity level of less than 5%.
If the substrate on which the microcement is to be applied is a mortar, it must have set for at least four weeks before applying the microcement, in order to control any cracks that may appear during the curing process.
Microcemento piscinas
At Topciment we have developed Atlanttic, a line of bi-component microcement designed exclusively for spaces in permanent contact with water such as swimming pools. Microcement swimming pools are a trend and will continue to be so due to the many advantages of this decorative coating. Here you can see some of the swimming pools covered with Atlanttic.
Microcement on natural wood or parquet
Parquet or natural wood floors have a large number of joints, the boards expand in different directions causing tensions that are difficult to control, which can cause cracks in the coating, so they are not suitable for applying microcement directly on them. In these cases it is necessary to lift the existing floor and prepare the substrate before laying the product.
3. Can microcement be applied over underfloor heating?
The switch-on protocol is as follows:
1. Switch on the heating at least 4 weeks after laying the cement mortar.
2. Maintain the inlet water to the circuits at 25°C for 2 to 3 days. Then gradually increase the water temperature to 45 °C and maintain it for several days.
3. Turn off the heating at least 48 hours before starting the installation of the microcement. The maximum floor temperature should be 18 °C.
Microcement flooring should be applied on cementitious mortars that have reached an advanced setting stage. This occurs after three to four weeks, depending on the weather. In any case, we must ensure that the mortar is practically dry. To do this, there must be a maximum of 5% humidity in the substrate, which should be checked with a relative humidity meter.
We recommend using quality self-levelling cement mortars.
Supports with powdery mortars are not suitable as the state of the application base must be consistent, otherwise it will be necessary to consolidate it.
After applying the microcement, we must wait at least 48 hours before gradually switching the heating back on (+5 °C each day).
Always change the temperature gradually at the beginning and end of the heating period.
Make sure that the relative humidity in the rooms is not too low.
Always avoid heat build-up caused by carpets and rugs or a lack of space between the furniture and the floor.
Important! Between the screed and the vertical walls there will always be an expansion joint so that the screed can expand. If this is not observed, cracks may appear.
4. Is microcement waterproof?
Microcement is not waterproof by itself, but it can be if a sealant is used as a finish and the microcement is thus applied to washbasins, shower trays, bathtubs or wet areas. At Topciment we have created the Topsealer WT sealer (water-based polyurethane varnish), a sealer with which to guarantee the waterproofing of microcement.
5. Is microcement slip-resistant?
Yes, depending on the type of microcement, texture left and sealant used, we can make microcement slip-resistant.
Thanks to microcement we can achieve any non-slip surface. Depending on the type of microcement and texture, a greater or lesser slip resistance (degree of slipperiness) is obtained. From less to more slippery we have: Microstone for being highly textured, Microdeck with a smooth texture, and finally the Microfino which is not suitable for floors
The different finishes for floors and their textures
Floors are classified according to their slip resistance value, and from lower to higher resistance there are 3 classes, class 1, 2 and 3.
With Topciment microcements we can achieve any of the required classes. Microdeck sealed with polyurethane corresponds to class 1 but if you simply apply a coat of sealer and a coat of polyurethane, you can achieve class 2. If Microstone is used, which contains coarser aggregate particles than traditional microcement, class 3 is achieved. The difference in texture can be seen with the naked eye.
The anti-slip characteristics of the surface and the difficulty of cleaning must be taken into account. The greater the slip resistance, the more difficult it is to clean the surface due to the textured surface.
Here you can find out more about cleaning microcement.
Non-slip finishes and classification according to slipperiness
In order to limit the risk of slipping, floors in buildings or areas for Public Residential, Health, Educational, Commercial, Administrative and Public Concurrence use, excluding areas of zero occupancy defined in annex SI A of the DB SI, shall have an appropriate class in accordance with point 3 of this section.
Floors are classified according to their slip resistance value Rd. This value is determined by the pendulum test described in Annex A of UNE-ENV 12633:2003. The Technical Building Code (CTE) in the document DB SUA-1 (Basic Documents for Safety in Use and Accessibility) regulates the slip resistance indexes and determines the class that a floor should have depending on its use. The floor becomes more slip-resistant as the Rd value increases.
Floors are classified, according to their Rd slip resistance value, as set out in this table: Floors are classified according to the following table
| Slip Resistance (Rd) | Class | |
|---|---|---|
| Rd ≤ 15 | 0 | |
| 15< Rd ≤35 | 1 | |
| 35< Rd ≤45 | 2 | |
| Rd > 45 | 3 |
Class required for soils depending on their location and characteristics
The table indicates the class that soils must have, as a minimum, depending on their location.
This class shall be maintained during the useful life of the flooring
Dry indoor areas:
surfaces with a slope of less than 6% -> Class 1
surfaces with a slope equal to or greater than 6% -> Class 2
Wet indoor areas, such as entrances to buildings from the outside (1), covered terraces, changing rooms, bathrooms, toilets, kitchens, etc:
surfaces with a slope of less than 6% -> Class 2
surfaces with a slope equal to or greater than 6% -> Class 3
(1) Except in the case of direct access to restricted use areas.
Outdoor areas, swimming pools (2), showers -> Class 3
(2) In areas intended for barefoot users and at the bottom of pools, in areas where the depth does not exceed 1.50m.
6. What are the differences between microcement and polished concrete?
With microcement you get more advantages:
- Faster and easier to apply.
- No machinery or heavy tools are needed for installation.
- Less work. Less cost. Less time.
- Lighter, so no structural loads.
- Use in any room, not just ground floors.
- No joints required, and no cracks appear when dry.
- It can be applied on both horizontal and vertical surfaces.
Differences between Microcement and polished cement (trowelled concrete) for paving in terms of components
A distinction must be made between, cement, cement mortar, and concrete.cement is a component of both mortar and concrete that acts as a binder. Mortar is obtained by mixing sand and water with cement and concrete is a cement mortar to which gravel is added.
Although they are all solutions for creating pavements, in the case of microcement it is continuous and in the case of polished cement, printed concrete or trowelled concrete it is discontinuous (requiring expansion joints).
CONCRETE
Both polished concrete and printed concrete, as well as trowelled concrete, consist of a reinforced concrete slab with a surface treatment applied to achieve the final finish. They are discontinuous pavements, and as they are slabs, expansion joints are required to prevent cracking.
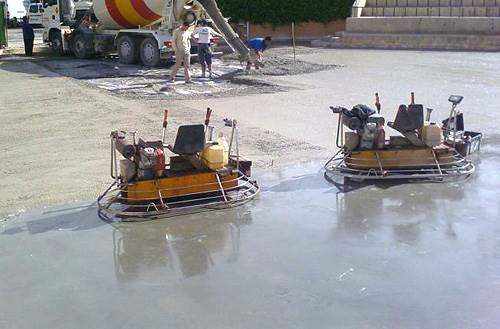
Trowelled concrete: In the case of trowelled concrete, mechanical smoothing is carried out with trowels or helicopters.
Printed concrete: While printed concrete is stamped with moulds. Both during the setting process (concrete hardening process).
Polished concrete: On the other hand, Polished concrete consists of applying a surface treatment to achieve the final finish but on the fully cured concrete. It consists of a mechanical process of grinding and polishing by means of which the surface is sanded with a polishing machine with diamond heads, leaving the section of the aggregates that make up the concrete visible, the final appearance is similar to terrazzo.
MICROCEMENT
Microcement is a coating that can be applied to both walls and floors, is approximately 2 to 3 mm thick, does not need joints and does not crack. It adheres very well to any material and is applied using a steel or rubber trowel.
MORTAR
The fattened mortar would be the smoothing that is done manually to a rendering (layer of mortar about 2 cm thick used to cover a wall)
In this table we summarise characteristics and compare the differences, as well as possible applications.
| Features | Surface | Thickness | Joints | Weight | Ideal for: | ||
|---|---|---|---|---|---|---|---|
| Microcement Topciment | Continuous trowel-applied coating | Walls ceilings and floors | 2 – 3 mm. | No joints required | 0.01 Kn/m2 | Renovations without debris, covering tiles, furniture coverings… | |
| Printed concrete or printed concrete | Surface treatment of concrete slab in plastic state | Floors | 5 -10 cm | Maximum every 25 m2 | (e=10 cm) 2, 50 Kn/m2 | Ideal for parks or public walkways. With rustic finishes simulating stone. | |
| Trowelled concrete or smoothed cement | Surface treatment of the concrete slab during the setting process | floors | 5 -10 cm | Maximum every 25 m2 | (e=10 cm) 2.50 Kn/m2 | With a smooth finish, ideal for car parks and large areas | |
| Polished concrete or Polished cement | Surface treatment of the hardened concrete slab | Floors | 5 -10 cm | Maximum every 25 m2 | (e=10 cm) 2, 50 Kn/m2 | Looks very similar to terrazzo. Smooth finish, ideal for large surface floors. | |
| Fattened mortar | Manual smoothing coating to a render | Walls or floors | 2 cm | A maximum every 25 m2 | (e=2 cm) 0,50 Kn/m2 |
7. How long does a renovation with microcement last?
As microcement adheres to the existing material, there is no need for building work, so microcement work can be carried out in a very short time: between three and five days. On the other hand, the application of microcement on floors increases this period up to one week.
This is a coating that is worked with a pre-conditioning of the surface, a application of the material in different layers, and a final protection with sealer.
Each layer of material has its own application and drying time. In addition, special care must be taken during the first week (once the work has been completed) as it gradually acquires its full hardness and resistance.
8. Do I need to brush the doors?
No, it is not necessary. The microcement will be built up on the surface to a thickness of 1 to 3 mm.
Normally the clearance between the doors and the floor is 5 mm, so there is enough clearance to avoid having to plane the doors.
9. How to clean microcement
One of the most frequently asked questions about this decorative coating is how to clean microcement. Although the cleaning of microcement is simple and with water and neutral soap is more than enough, in Topciment we have created exclusive products for cleaning and care of microcement to obtain better results over time.
The care of microcement is similar to that of natural wood parquet. It is advisable to avoid permanent waterlogging and prolonged contact with humidity. We must avoid leaving wet carpets and towels on the floor or pots that leak liquid. The surface should also be kept free of stones or grit, which can scratch the coating when stepped on. Avoid bumping and rubbing against hard objects.
Although microcement is highly resistant to chemical products, microcement should be cleaned with neutral soaps, never with aggressive products or descaling agents. Avoid products such as chlorine, bleach, ammonia, soaps and detergents in general, as they can damage the protective film.
Initial care
Microcement reaches the desired values of hardness, chemical resistance and waterproofing one month after application. The greatest risk of damage is in the first two weeks. It will be trafficable with great care two days after sealing of the pavements, and trafficable as normal one week later.
We recommend avoiding dragging heavy objects to avoid damaging the surface. To move furniture: it is better to lift and support, never drag. It is necessary to protect the floor from furniture (metal legs, sharp surfaces), and from objects with abrasive contact surfaces or of considerable weight, with covers or felts.
Permanent care
We recommend periodically maintaining microcement floors with Ceraciment or Ceraciment PRO or acrylic waxes. The frequency of waxing will depend on the use and characteristics of the location (traffic, surrounding dust, etc). We recommend the use of wiping mops to ensure correct application of the product.
10. can microcement lose colour over time?
In Topciment, microcement manufacturers, we have a wide range of microcement colours to cover any type of surface. However, can microcement lose colour over time? No, our microcement colours behave in a stable way, without suffering alterations over time and without being affected by the weather.
The pigments we use to make our dyes are of mineral origin. Within the pigments we distinguish between those of mineral origin and those of organic origin. Pigments of mineral origin are the ones that behave best against the alkalinity of the cement. Organic pigments (molecules containing carbon) are not stable in the open air, they end up transforming into other compounds without pigmentary properties or migrating to the surface, so that some initial tones end up disappearing almost completely after some time. Inorganic pigments generally maintain stability in mortars and concretes.
11. Why might there be differences in brightness between the sample and the work being performed?
The application of microcement is a craft, factors such as the material load or the roller used in the sealing process mean that there may be small differences in gloss between the sample and the work. . The catalogues are sealed with a roller, if the sealing is done with a spray gun, a slightly higher gloss is achieved.
12. Can colours be combined on the same surface?
13. Is it compulsory to apply the microcement mesh?
14. What drying time should we allow between the first coat of sealer and the second coat?
The drying time between coats of sealer or varnish will depend on several factors. For example, the weather conditions, the relative humidity, the ambient temperature of the room, whether it is an enclosed and humid space such as a bathroom, whether the sun has a direct impact on the room, etc.
In any case, we will always try in all circumstances to allow as much drying time as possible between coats to prevent white stains from forming because the surface is still damp. The minimum drying time between coats is 4 hours for Presealer and 24 hours for Topsealer.
15. How much does microcement cost per m2?
The travel time of the professionals, the type of microcement selected and the substrate on which the microcement is to be applied are some of the factors that will determine the price per square metre of microcement.
16. Can microcement be applied at low temperatures?
17. Can microcement be applied in very hot weather?
Just as in winter, in the summer season a series of precautions must be taken if work is carried out with this material. Although it is a coating that resists perfectly, once applied, to the sun’s rays. A resistance to UV light has expanded the bet of projects with microcement in outdoor spaces such as terraces and swimming pools.
In summer, avoid applying microcement in the central hours of the day and in the afternoon. Time slots in which the support is very hot and, if the material is placed, it could contract and expand the surface. During the rest of the day there is no problem.